-edible zone-
No.6435 Overview
Starting Line
Arrival Deconstruction
Beneath Decks
First Night's Spin
Listening to Plinths
Motor
System: The Tonearm Tweaks Articles
Bookshelf
Transit
*
COMPLETE DISASSEMBLY & stripdown of spindle
bearing.
Somewhat easier than it seems …… From below, the whole
grease jet and it’s cap must first be removed to allow clearance for the
assembly to be extracted through the top deck. This seems intimidating,
at first, until you remember that it is a grease bearing, and not filled
with oil or anything that’s going to run all over uncontrollably. Even
broken-down grease remains pretty manageable.
Something I've gone
all-out on is to mark or note the exact position / orientation of parts
that might have two or more ways to go back together. This is all under
the hood, so my little directional triangles and dots will never show on
the finished deck. The rationale here is that things tend to wear in to
a certain mode of fitting, especially on a fifty-year old unit. I won't
be disturbing their style at this point.
The grease I've chosen as
replacement is an assemblage of negatives--- that is, there's no PTFE,
no Teflon, no Moly, no additives. Pure black petroleum distillate ---
plain and unimproved is what I was after. The idea I've gotten from
researching this --and will go with-- is that the lubes used herein
should contain nothing that similar weights of lube wouldn't contain
back in 1955, when this was manufactured. Use nothing that could
possibly do harm.
THERE IS NO BEARING (ball) in a grease bearing.
... I suspected that I'd have to soak the bearing elements in some
solvent ( I opted for plain Zippo lighter fluid (naptha) in this case.
I've used it for years on everything and I know from Lp-cover adhesive
removal that it evaporates quickly and leaves no visable residue of it's
own, even on a white Lp cover.)---- but soon found that the old greases
just slid off the HYPER-POLISHED MIRROR-FINISH hardened steel spindle
shaft. This particular part of the Garrard, along with the interior
polished-brass sleeve, is one of the most highly-finished / precise
parts I've ever seen in any field short of aerospace; certainly blows
away any 'record player' elements I've ever seen. A Zippo-soaked cloth
finishes the cleanup of the bearing-shaft interior.
Most
intriguing, though, is the lack of any thrust-ball arrangement below the
central spindle. The super-polished base of the spindle shaft sits
squarely (roundly ?) on a small phosphor-bronze thrust-pad and rotates
on that surface, flat-base on flat-pad, courtesy of the pressurized
grease surrounding and submersing the whole column.
GREASE is the
word.
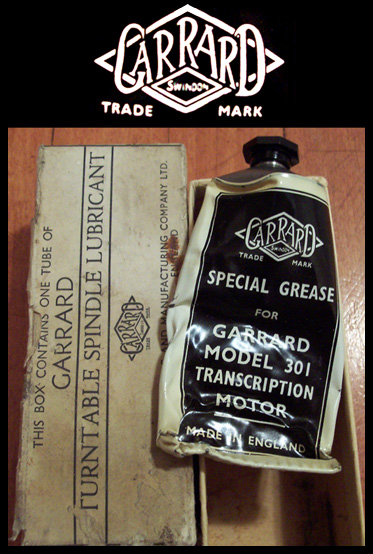
Garrard originally included a tube of their exact
specification of bearing grease, nozzle appropriately sized for
injecting the bearing periodically. Lacking either the
appropriately-nozzled grease-gun or the long-gone accessory tube of
Garrard Grease, the best way to cram this thing full of grease was by a
longish 'coffee stirrer' stick, the wooden one that's about one-eighth
inch wide by five or so inches long. With this implement it's pretty
simple to "paint" a thick inner layer all the way through the inside
length of the bearing housing. Go over the top a little here, as the
object is to eliminate all air once the spindle shaft is re-inserted.
The reinsertion is somewhat tantric and takes a few minutes for the
shaft to penetrate. This is fine because the side-loader jet and cap may
be filled w/ the black stuff and coaxed onboard while the shaft is still
coming through. But first check the progress through the port, which
actually allows a side-view of the progress as it goes.

Be prepared for the top-deck-side spindle to
emerge super-well-gunked, and have the materials on hand for tidying up.
Again, simpler than it all sounds, since you can slow the progress of
the spindle shaft at any time by leaning more to the horizontal, which
causes it to stop pretty quickly. Any apprehension about a
grease-bearing changeout is pretty soon dispelled.
With motor
unplugged and switch to off, replace platter, and only then switch to on
(still unplugged). By manually rotating platter, the grease-blanket
inside the
bearing is evening itself out, hopefully sending any
air pocket out the top, where you'll find a new, liquid
residue
of black grease that has come all the way through the bearing. That's
correct. This leaks out of the top . Tighten up a little on the
grease-jet on the side of the assembly and more and more of the grease
works it's way through, and then out, of the top.
Keep mopping
up, replacing platter and repeating manual rotation.
One wants to
get grease into every spare millimeter of the interior space of the
bearing. All should be reassembled once grease is repacked; note
orientation markers & arrows. Do take care to set on off switch
accordingly. In "off" the small platter brake is on, but you may place
and replace platter gently, again, always favoring rotation toward
clockwise. In "on" the brake is off but-- the whole motor / idler
assembly is engaged, so be aware that even with power off, there's a lot
going on.....
Next Page .... Beneath Decks